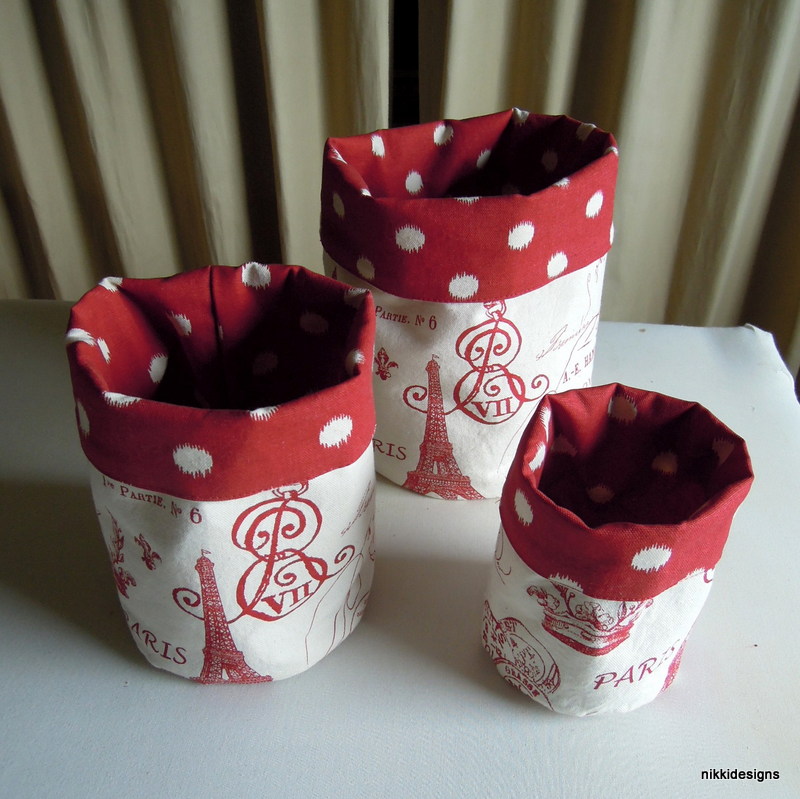
Fabric buckets are easy to make and a great way to use up leftover fabric. Use them for toys, office supplies, kitchen accessories, craft supplies, you name it!
You will want to use fabric that is strong and non-stretchy. If your fabric is really stiff, like canvas, you can omit the interfacing. It is a good idea to pre-shrink your fabric before making the buckets, that way they will be washable.
My bucket finished sizes (with fold) – small: 4″ diameter x 5″ tall, medium: 6″ x 7″, and large: 7″ x 9″
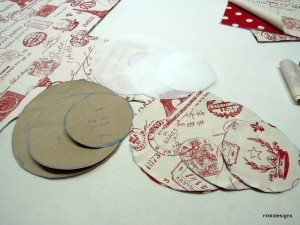
Step 1
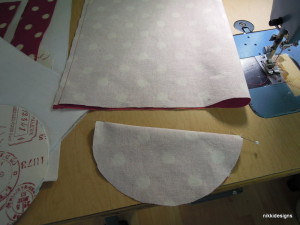
Cut out the bottom circles and sides, 1 of each fabric for each bucket.
small – cut circles 4 3/4″ diameter, cut sides 14 1/2″ x 8″
medium – cut circles 6 3/4″ diameter, cut sides 19 1/2″ x 10″
large – cut circles 7 3/4″ diameter, cut sides 24″ x 12″
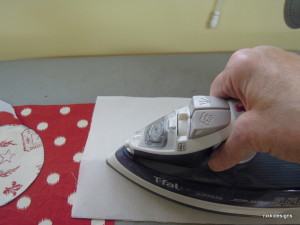
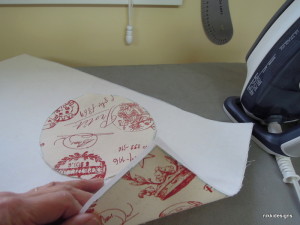
Step 2
Cut out 1 piece of heavy, fusible interfacing for the side and bottom of each bucket
Iron it on to one side and one bottom for each bucket
Step 3
Using a 3/8″ seam allowance, stitch the side seams for each side piece.
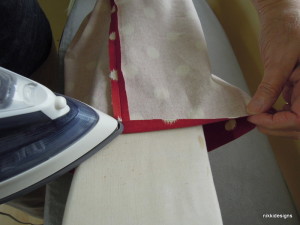
Press the seam allowances open. Press the top of each side 1/2″ towards the wrong side.
Step 4
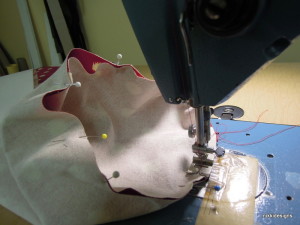
Pin one bottom circle to each side at the end you have not pressed. Stitch, using a 3\8″ seam allowance.
Step 5
Turn the bags right side out. Place the liner inside the bag, lining up the side seams and tops. Pin and top-stitch the top edge. Fold the top of the bag over about 2″. You are done!

This month I am giving away this set of fabric buckets to one lucky winner!
Contest runs from January 14 – 24, 2014 Enter here
Proud of this one!