Do you love the look of roman shades? Do you love to DIY? With a little time and patience, and some basic sewing skills, you can make them yourself. I am going to share some of my tips for making a great looking classic roman shade.
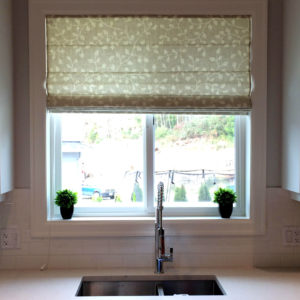
I have been making roman shades for over 25 years, and they are my favorite window covering. These instructions are for my pleated style roman shade.
First, measure your window accurately. Using a metal tape measure, measure the width and then the length in a few places. Record the smallest number for each. Your finished width will end up 1/4″ less than this measurement, which is what you want for an inside mount.
Cut your fabric 2″ wider than the finished width and cut the lining the same as the finished width. Cut both pieces 6-12″ longer than the finished length, depending on the length of the shade. Follow this formula to determine the cut length:
Finished length + #pleats x .8 + 6″
To determine the number of pleats you will need, divide the finished length by 7 (round up to the nearest whole number)
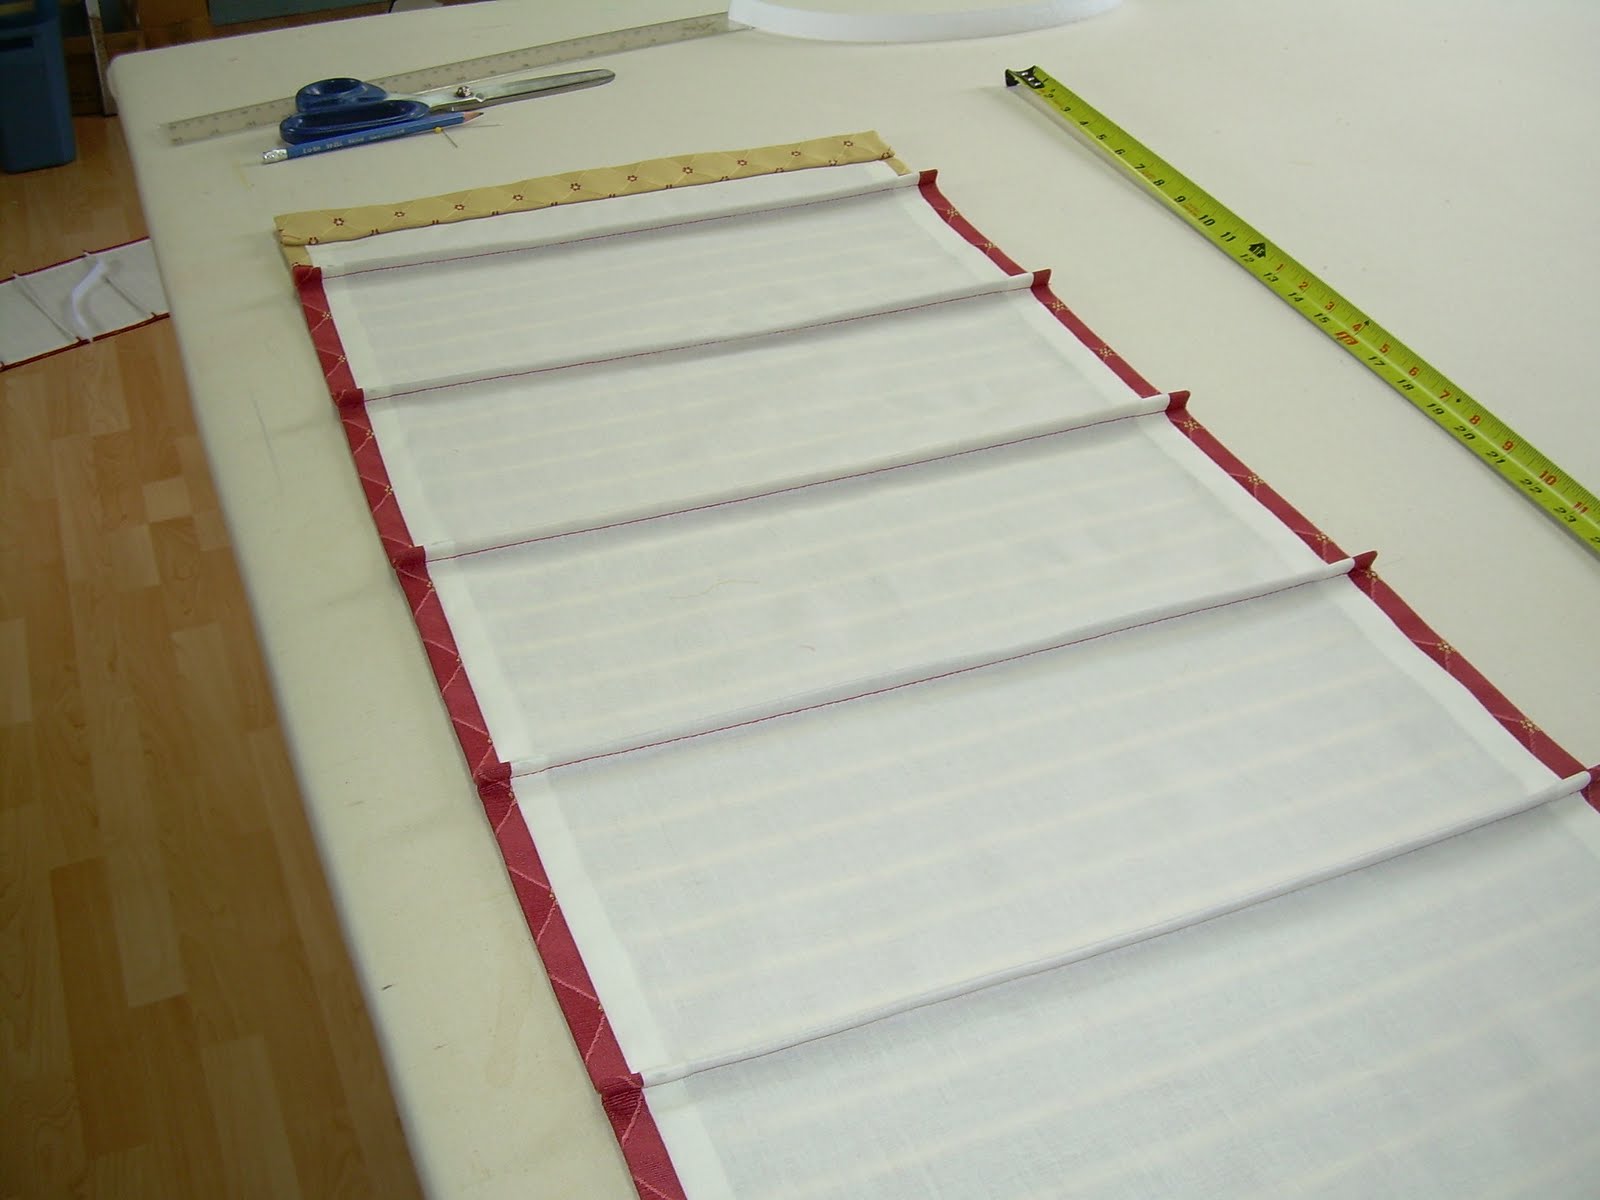
With right sides together, stitch blind to lining at sides, with 3/8″ seam allowance. Press seam allowances towards the lining. Turn right side out, center lining and press. Square off the bottom, trim, and press 2 1/2″ to wrong side. Press edge again 1/2″ and top-stitch close to fold. Stitch one end closed.

Mark horizontal lines lightly with a quilter’s pencil on wrong side. These lines should start 3″-4″ from the bottom of the shade and be spaced 6-7″ apart. Pin “pleats” along pencil lines and sew 3/8″ from fold. Press pleats towards top of blind.
Measure the finished length and mark with pins. Press this line to wrong side. Measure 1″ and cut off excess. Pin female (soft side) of velcro to wrong side at top. Sew close to both edges of velcro.
Make the headrail. I use 1 x 2 pine, with the skinnier side facing forward. Cut the headrail 1/4″ less than width of window. Board may be wrapped in muslin. Staple male velcro to the front of the board. Mark positions of the cord lock (if using), and screw eyes. Drill holes and screw into place. The outside screw eyes should be about 2″ in from the sides, the remaining ones evenly spaced 10 – 12″ apart.
Cut 1/4″ fibreglass, plastic or wooden rods 1″ less than the blind width. Insert into pockets. Cut bottom rail and slide into bottom pocket. Mark vertical points, using the screw eyes on the head rail as a guide. Attach ring clips or hand sew on rings with strong thread.
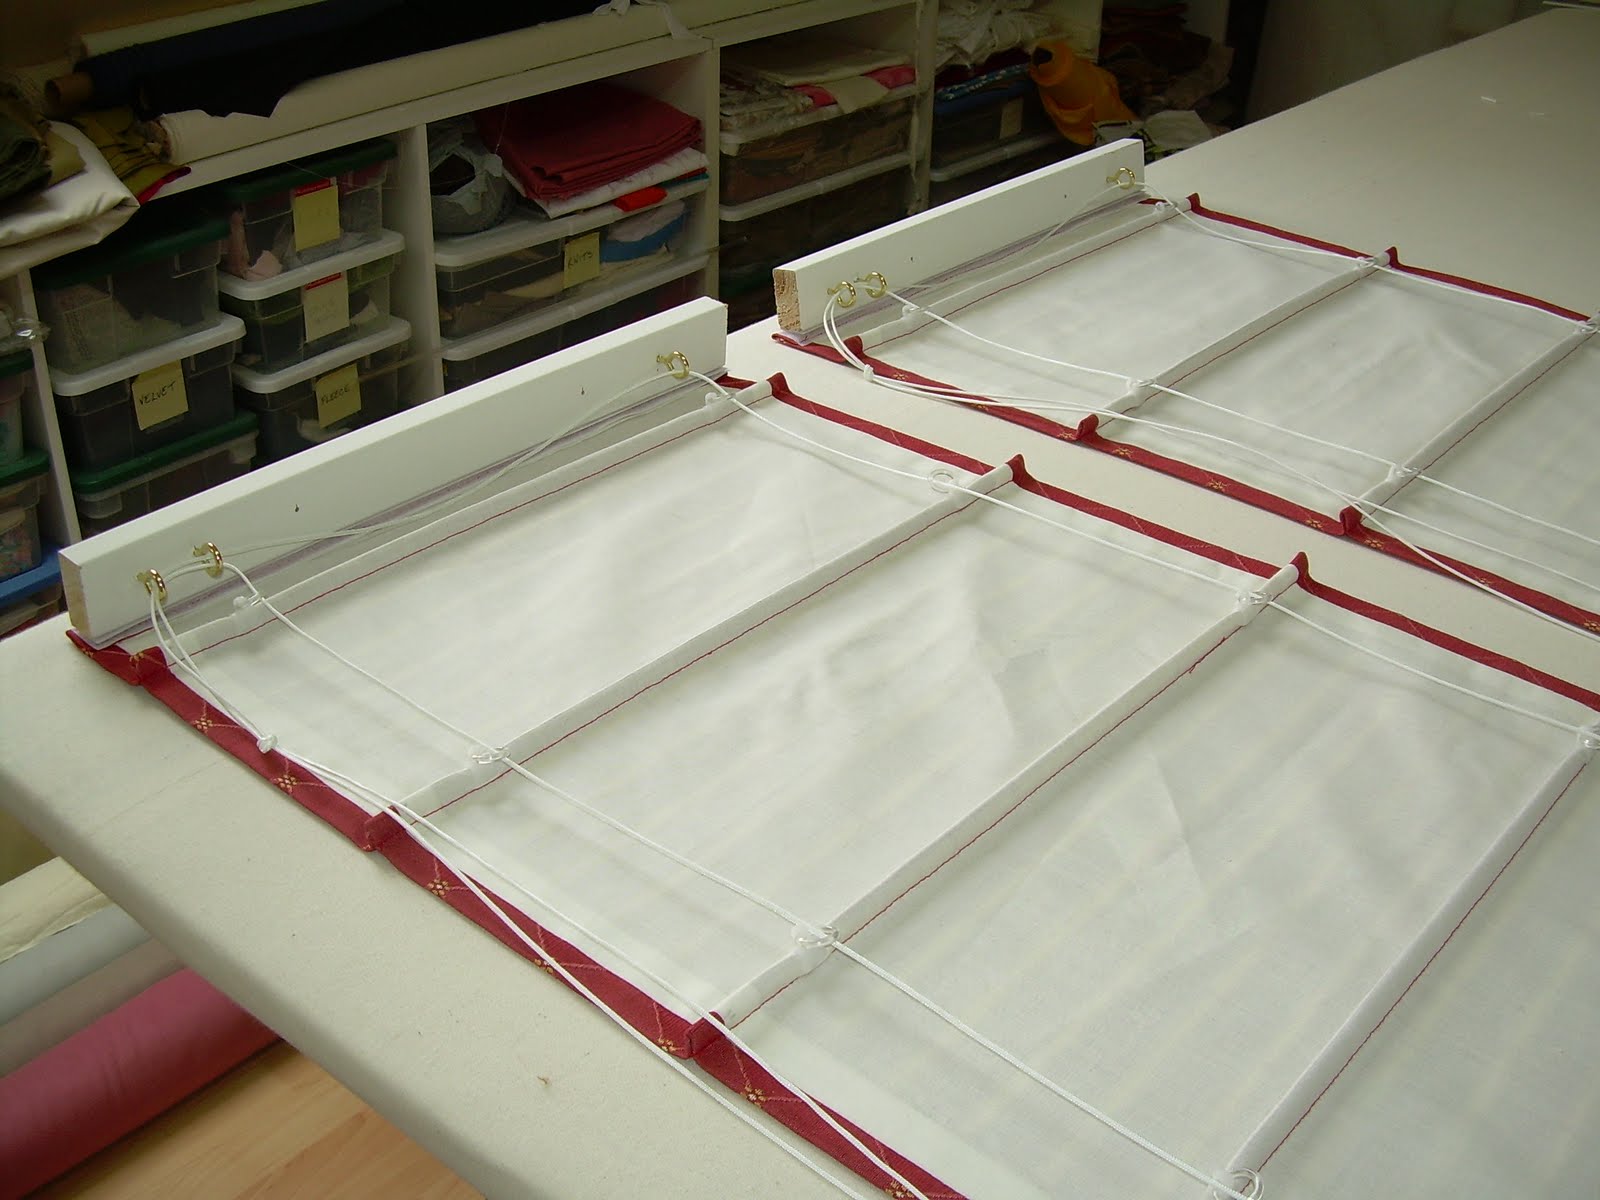
Attach headrail and string your blind. Use a double knot at the bottom ring, pass string up through each ring and across the headrail through each screw eye. Cut off string about 3/4 the length of the blind. Once all the strings are done, make sure your blind is flat and knot the strings together near the top outside screw eye or cord lock. Attach tassel at end of strings and trim strings so that they’re even.
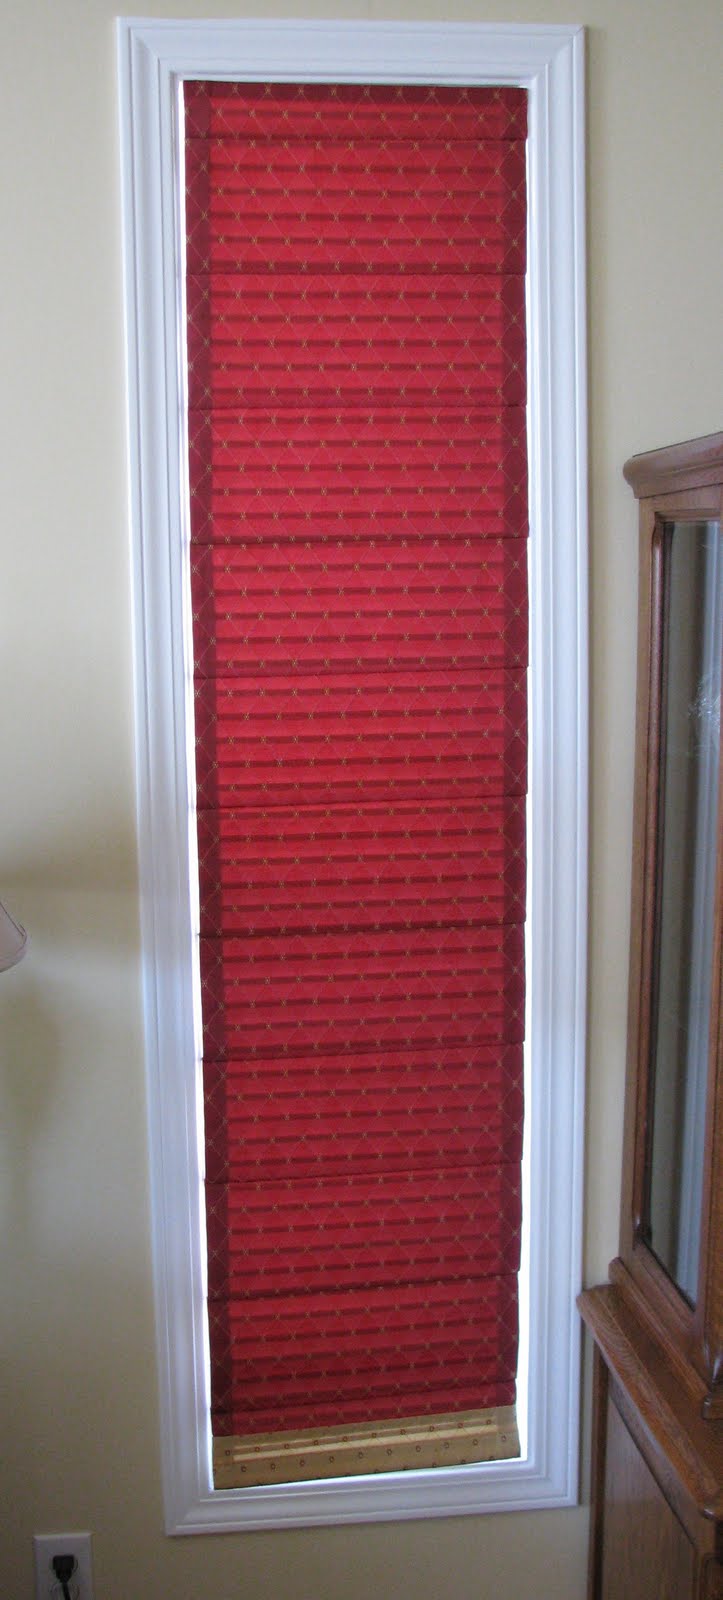
To install the blind simply screw 1 1/2″ long screws up through the headrail into your window casing (pre-drill holes). The front of the blind should be flush with the outside edge of the window frame.
You can also contact me for more information, supplies and help.
An overview on DIY Blinds.